Shunda Flooring Installation
Sunday, 24 July 2016
There are several ways to install wood flooring, depending on the type of flooring itself; because the installation will be adjusted from the flooring’s basic material.
As an innovative flooring product made from PVC, Shunda Flooring also has it’s own installation procedures. But before going to installation, you need to know first the difference between Shunda Flooring and any other conventional flooring products. The most fundamental difference is the basic material. Shunda Flooring is made of PVC, so it is wood free with a natural look of wood. In general, parquet consists of four layers; the top layer is an UV coating for scratch-resistant and glossy look. The second layer is decor film. Then on the third layer or commonly referred as the core material that differentiate Shunda Flooring with other flooring is a layer of wood, compacted wood material or high density fiberboard (HDF). But Shunda Flooring products are using polyvinyl chloride (PVC) sheets. At last, the bottom layer is a moisture resistant which purpose are to pressure and holds all the layers in place from humidity.
Shunda Flooring can be installed very easily with Do It Yourself (DIY) method that has been a trend for home interiors in various countries. This method enables consumers to install their own flooring without direct assistance from the experts
The first step is to prepare the necessary tools and materials that are needed to install Shunda Flooring, such as, cutting tools, spacers, pencils, gauges, rulers, pull bars, hammers, and protective goggles. The required materials will differ according to the needs and sizes of the room. Calculate the needs of Shunda Flooring, make sure you have enough to cover the floor. After the equipment and Shunda Flooring’s plank is prepared, the next step is preparing the subfloor.
An Important things before installing Shunda Flooring is the subfloor, it has to be flat and even. The subfloor can be a concrete, plastered, wood, or tiles. After ensuring the subfloor the next step is to apply foam (Sheets) as Shunda Flooring underlayment. This foam is to reduce the temperature and humidity that may occur and the secondary purposes are to reduce noises and softening the pads. One of the advantages of Shunda Flooring is that it is not required to use foam sheets or other similar underlayment because Shunda Flooring is a wood-free material with excellent resistance to temperature and humidity; That makes Shunda Flooring proven to be anti-termite products. But in order to obtain the underlayment secondary function, it is recommended to use foam sheets.
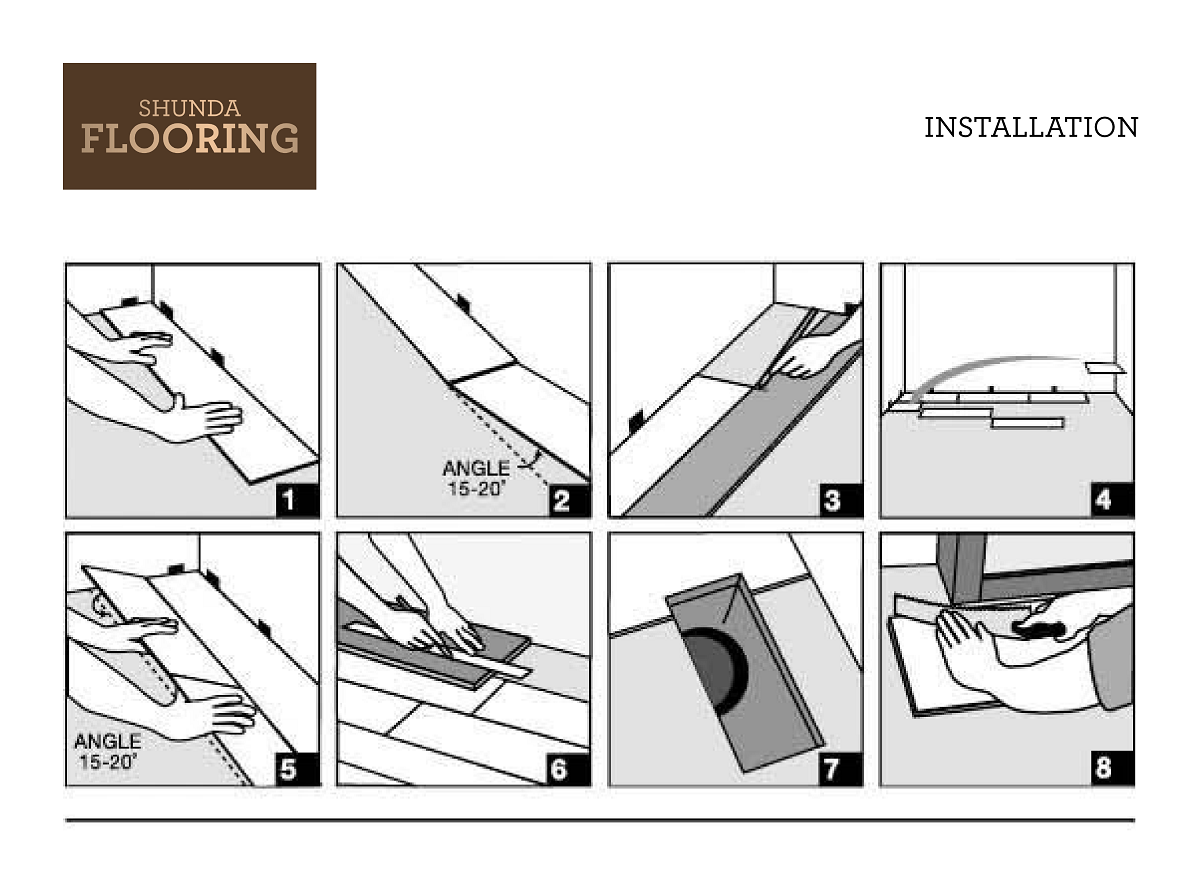
Shunda Flooring has a floating system installation starting by placing the first plank’s tongue facing the wall then continue to install the next like a puzzle game. It will be better to use a spacer along the periphery between the wall and the plank for the expansion space with a range of 5/16 inches up to 3/8 inches. The joint between planks are using interlocking system. Shunda Flooring have various installation pattern that can be applied as you wish, such as; Random patterns, brickwork patterns, and stair steps patterns. Gauges and cutters are also needed to adjust the size of the plank on the edge of the room. The final step is to lock the edges bordering other rooms by using trim, moulding and other accessories available in stores. Finally Shunda Flooring is ready to create a natural, modern and luxury on your room.


